Introduction
During winter, plants are often subjected to inclement weather. Heavy winds and blizzards can decimate vulnerable plants. Certain materials, such as burlap and twine, are often utilized by arborists and landscapers to protect plants from incurring winter storm damage. Plants that have thin bark, such as ash, flowering dogwood, linden, and maple often benefit from winter wrapping.
How Does Wrapping Plants in Winter Protect Them?
Wrapping plants for winter reduces the moisture lost from heavy winds and the glaring sun. It also minimizes the potential for sunscald, a type of winter bark injury. Sunscald, also called southwest injury, refers to a process in which the outer bark of a plant is prompted by the sun to break dormancy. When temperatures plummet, the bark rapidly cools. This shocks the active bark tissue, causing it to sustain massive trauma. When a tree has been affected by sunscald, the bark slowly darkens, turning a reddish-brown color. The bark then thickens, becoming rough and hard. Eventually the callused tissue cracks and falls away, revealing the damaged inner layers. Sometimes only the outermost cambium layer is damaged, and a sunken area will gradually appear on the trunk.
Winter wrappings can help to conceal plants from salt sprayed from roadways by passing vehicles. They are effective at deterring deer and other animals, like rabbits and voles, from consuming plant foliage. Plants that are not wrapped for winter may experience breakages caused by significant snow or ice accumulation. Certain evergreens, particularly those that grow in an upright fashion, can be deformed when they suffer breakages. Wrapping plants ensures that their branches are bound close together, enabling them to better withstand loading from ice or snow.
Why Proper Wrapping Is Important
Various materials are available for use in wrapping plants, though not all are ideal. Some plastic materials absorb too much sunlight. As the heat increases on the bark, it can encourage plants to break dormancy, and produce new growth. As temperatures fall, the tender growth abruptly cools, and is severely damaged or killed. If wrapping materials are not properly applied, moisture can build up in the overlapping layers. Excessive moisture can promote decay on vulnerable plants.
How to Properly Wrap Plants with Twine
Materials Required:
- A pruning ladder
- A spool of twine
- A utility knife or a pair of scissors.
1.) Select a branch at the bottom of the plant, and attach the twine. Avoid securing the twine too tightly, as this can girdle the branch.
2.) Proceed to wrap the remainder of the plant, gradually moving upwards. If needed, use a pruning ladder to reach the top of the plant.
3.) Occasionally inspect the twine to ensure that it is pulling the branches taut.
4.) Once the uppermost branches have been sufficiently wrapped, use a utility knife or a pair of scissors to cut the twine. Wrap the end of the twine around a thick branch.
5.) Remove the twine in spring, as bud expansion begins.
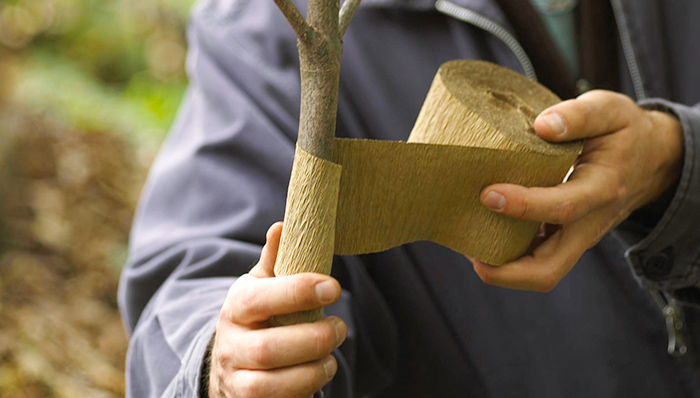
How to Properly Apply Burlap to Plants
Materials Required:
- A bolt of burlap
- A pruning ladder
- A spool of twine
- A few clothespins
- Wood staples
- A utility knife or a pair of scissors
1.) Attach the open end of a bolt of burlap to the top of a plant’s most dominant branch with a clothespin. If necessary, use a pruning ladder to access the upper portion of the plant.
2.) Run the bolt of burlap from the top of the plant to the ground.
3.) Wrap the burlap around the plant’s trunk. Begin from the lower branches, and proceed upwards. Allow each layer to overlap the previous layer by four to six inches.
4.) Continue wrapping the plant in burlap. Once the uppermost branches are secure, use a utility knife or a pair of scissors to cut the burlap. Using another clothespin, attach the burlap once again to the top of the plant’s most dominant branch.
5.) Cut three pieces of twine, and secure them around the burlapped plant. Wrap the first piece of twine around the upper crown, one around the middle, and one around the base.
6.) Remove the clothepins that were used to hold the burlap in place.
How to Construct a Windbreak
Materials Required:
- Three wood stakes that are one foot taller than the plant
- A mallet
- Measuring tape
- A bolt of burlap
- A utility knife or a pair of scissors
- A powered staple gun
- Wood staples
- A few clothespins
- A pruning ladder
- A spool of twine
1.) A burlap barrier can be erected near plants to buffer winds, and redirect sunlight. Using a mallet, hammer three wood stakes at the northwest, southeast, and southwest corners of the plant’s root zone. The three wood stakes should be one foot taller than the plant they will be protecting. The stakes should be spaced half a foot to one foot away from the plant’s crown. They should be hammered into the ground at a depth of 6 inches.
2.) With a measuring tape, determine the distance between the three stakes. Unfurl the bolt of burlap, and use a knife or scissors to cut a length of the material that is equivalent to the distance between the stakes.
3.) Measure the width of the plant. If the initial piece of burlap is not sufficient to cover the plant, cut a second length, and attach it to the stakes, just above where the first one terminates.
4.) Using wood staples and a staple gun, secure the end of the burlap to the stake in the southeast corner at 1 foot increments. Apply the first staple at the soil level, and progress upwards. Prior to applying each staple, stretch the burlap until it is taut.
5.) Extend the burlap from the southeast stake to the stake on the southwest corner. Following the aforementioned procedure, attach the burlap to the southwest stake using staples. Staples should be applied at one foot intervals. Pull the burlap taut before applying each staple.
6.) Finally, navigate the piece of burlap from the southwest stake to the northwest stake. Staple the burlap to the northwest stake using the same method as before.